Installing the Transaction Printer
The printers can interface through a USB connector or an RS-232 connector.
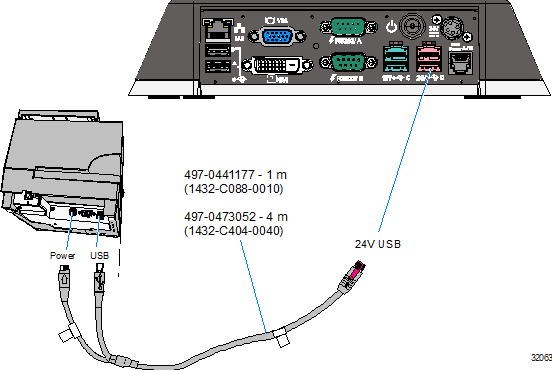
USB Installation
Connect the Powered USB Printer Interface Cable to the USB Connector and Power Connector on the printer and to the 24 V Powered USB Connector on the terminal.
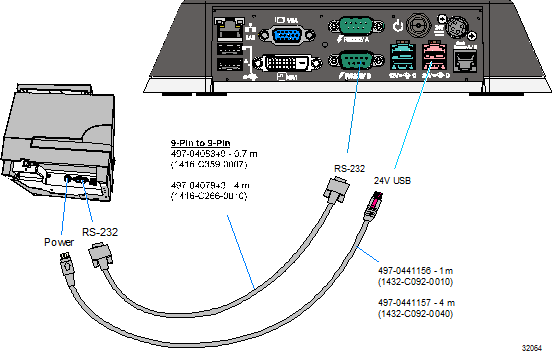
RS-232 Installation
| 1. | Connect the RS-232 Printer Interface Cable to the RS-232 connector on the printer and to a non-poweredRS-232 connector on the terminal. |
Note: The factory default setting for the RS-232 ports is powered. See the Appendix: Powered Serial Port Settings.
| 2. | Connect the Powered USB Printer Interface Cable to the Power Connector on the printer and to the 24V Powered USB Connector on the terminal. |